
SO you’ve decided to dabble in some Facebook advertising, you clever thing. You know that you can target very specific people, and see clear ROI on ads, and even chase people around the web sorry, retarget your customers. But you need a Facebook pixel. You’ve heard of it, you know it’s a technical thingy, but how do you get it, and what do you do with it once you have it?
The fabulous news is that implementing your Facebook pixel is not as tricky as it sounds.
All you do is paste a snippet of code in the backend of your website once, and Facebook will show you all you want to know.
HOW TO GET YOUR Facebook PIXEL
Video: How to set up your Facebook Pixel without touching the code…
I hate videos, what are the instructions?
- Go to facebook.com/ads/manager. (This is assuming that you already have a Facebook advertising account connected to your profile. If you’ve ever boosted a post or run an ad, you have this account. If you don’t, you can set one up now)
- Click on the little hamburger menu icon at the top left of your screen, and then scroll over All Tools. A larger menu will pop out to the right. Click on Pixels under Measure & Report.
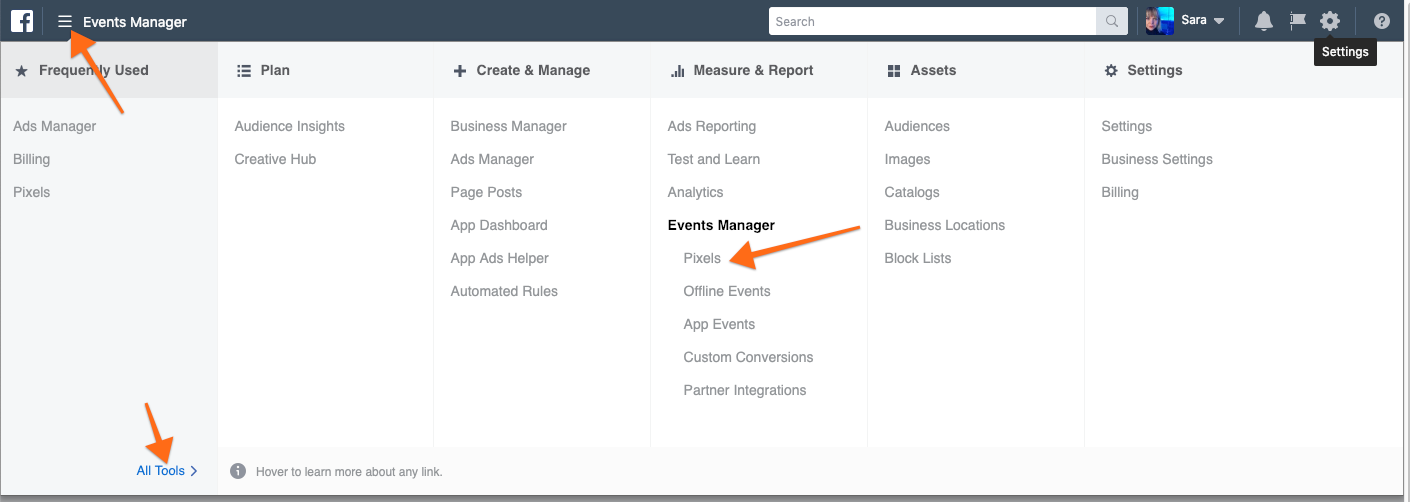
- Click on the green button that says Create a Pixel. Give it a name like “[Your Company Name] Facebook Pixel.” Then click the Create Pixel button.
- To connect with your website platform, Facebook now has several guided ways to do it, which you will see as you go through this process. If you’re on any of the major platforms – WordPress, Squarespace, Wix etc, just follow the instructions, there’s only a few steps.
I clicked something else, I’m lost!
If you exit the page without following these. To see them again just go to the Events Manager/all Tools/Partner Integrations link to find all the available website platforms and other tools – including Woocommerce. Connect the ones that are relevant to you. If you are selling online, definitely connect your ecommerce platform.
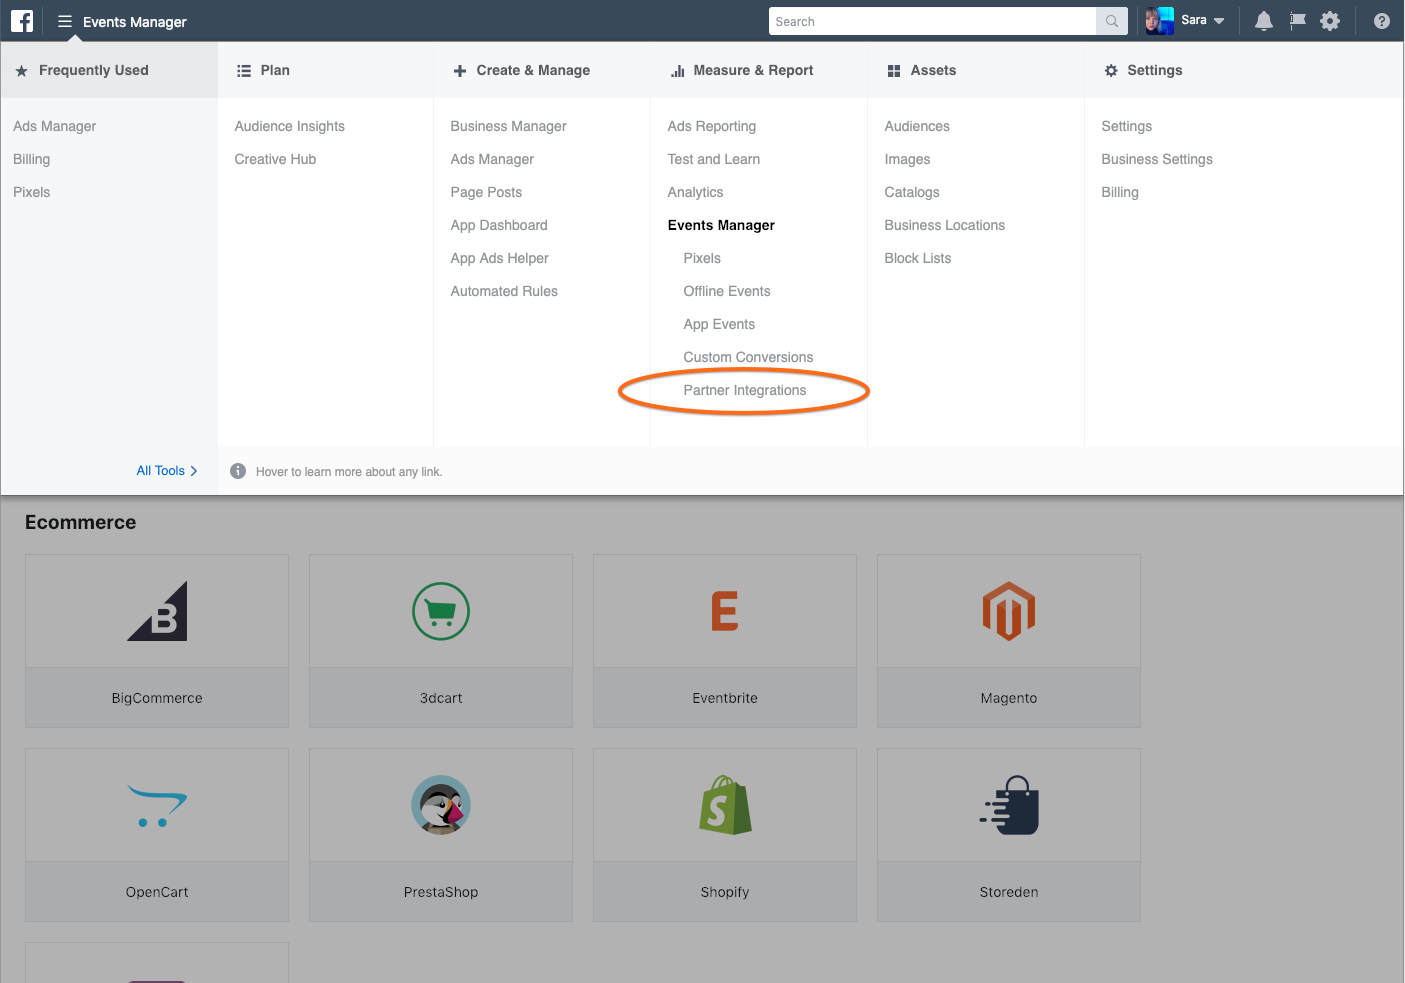
I Want to add my Facebook pixel manually, where do I get the code?
Ok so you have a different website platform, or want to do it without a plugin. If you need to get the code for your Facebook pixel, just click on ‘Set up manually’ when you get to the end of the process of creating it. From there you can click through and copy the code that it tells you. It will look like this:
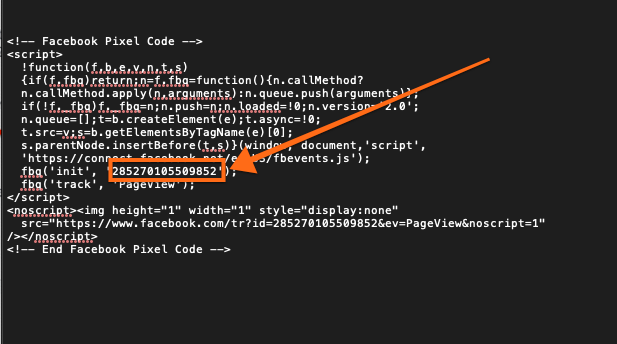
Copy the whole lot and paste into the Head tag of your website, Facebook makes it clear where that is. Or if you just require the specific ID to paste into a different plugin, all you need is that number highlighted above after the code: fba (‘init’,
Video: How to get the code you need to paste your Facebook Pixel into your website:
And that’s it! Once you’ve added that pixel to your site, Go forth and advertise.
The next step will be to set up some custom conversions, so you can really measure if your ads work. Find that blog post here….
Pin me and share the love…




0 Comments